How to fix a stripped oil drain plug in your Harley Davidson
A stripped oil drain plug is relatively easy and inexpensive repair that anyone can do
It really doesn't matter if the stripped drain plug is on your Harley Davidson, Jap bike, or lawn tractor, the technique to fix a stripped drain plug is the same.
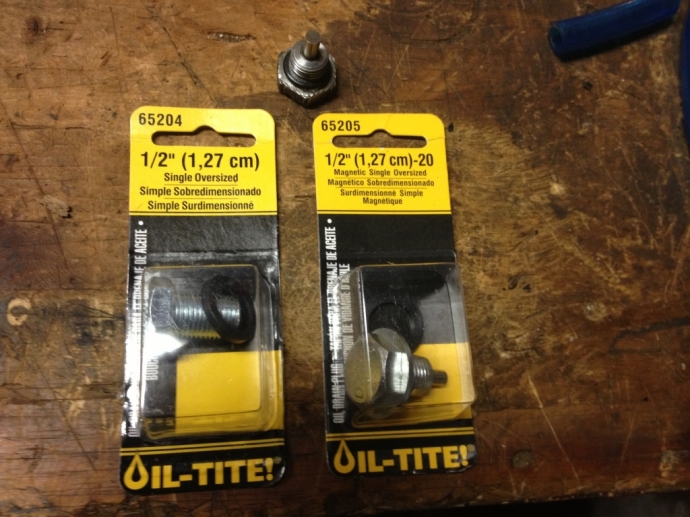
I purchased the new oversized drainplugs at an Auto Value store. I bought two different styles since I wasn't sure which one I would end up using. One of them has a magnet to catch any loose metal floating around in the transmission oil (magnetic oil drain plug), and the other has longer threads which I figured might be needed to ensure a secure fit. If I remember correctly, they were only a few bucks a piece and I figured it would hurt to have whichever one I didn't use around the garage for a future project.
Oversized oil drain plugs made to replace a 1/2" oil drain plug.
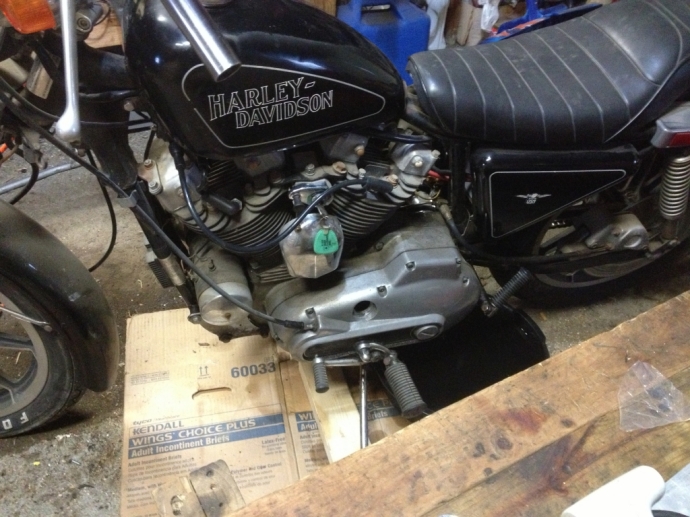
This is my 1979 Harley Davidson Sportster, it's not quite a harley davidson museum piece, but it's bought and paid for. To make a long story short, it's been sitting in various garages and sheds for a lot of it's life, and I am in the process of getting it running again. It's 1000cc motor with a 4 speed transmission. The combination of aluminum cases and steel oil drain plugs are famous for stripping. Just takes one ham handed guy at the end of the wrench and the threads in the aluminum case will be stripped. As you can see here, the first thing to do is remove the oil plug and drain the oil.
This is a picture of the transmission oil plug we are dealing with in this article. You can see lot's of gunk all over from the old oil plug leaking as well as the side cover gasket, we're gonna fix both of these issues. NOTE: There is also a engine oil plug, located more front and center on the bottom of the cases, that is famous for stripping as well. As a quick side note, don't use that plug to drain your engine oil, just use the one on the bottom of the oil tank.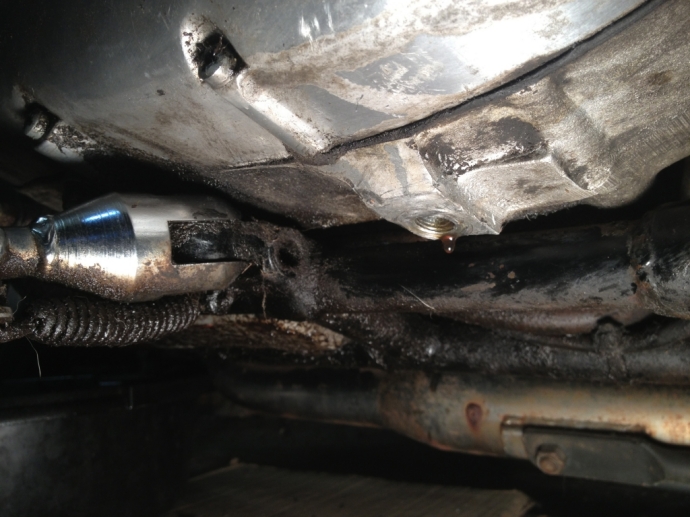
I wanted to use the magnetic oil drain plug if possible, it was slightly longer than the orginal plug so I first stuck a short screwdriver into the hole to make sure I wasn't going to bottom the new oil plug out on something inside the case. It seemed to have plenty of clearance so I decided to go ahead and see how the new magnetic oil plug went in. 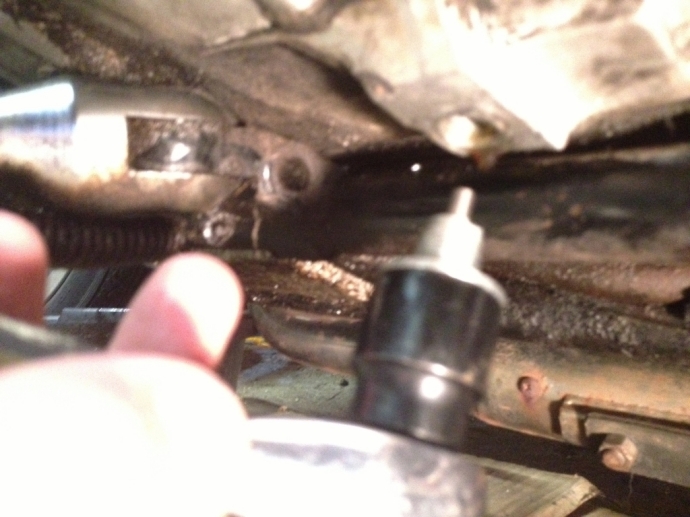
Use a ratchet and socket to do this, not a wrench, because you need to be able to hold it straight with the hole and apply pressure as your turning. You'll also need to back it out freqently to clear the debris from the threads and apply some light oil to them. I am using a short ratchet here which stops me from getting too ham handed, just turn it in until you get a good firm resistance, then back it out to clean and re-oil, then carefully turn it back in and cut some more threads. Rinse and repeat until you've seated the new oil drain plug all the way in. 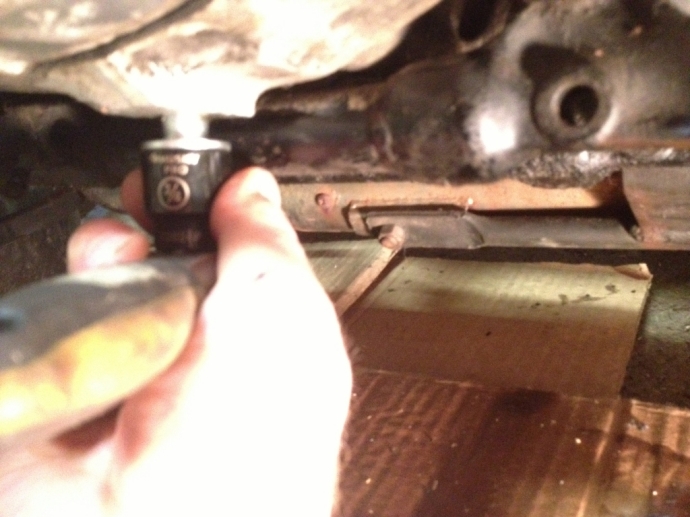
Ok, now you have the new oil plug fully seated into the case. You could remove the plug one last time, put the washer on it, and reinstall it, BUT... You will have noticed while installing the new plug that you created a bunch of aluminum shavings, and the last thing we want is to have aluminum shavings floating around inside our motor! Now, I suppose you could flush it out, by removing the plug and pouring some oil through in hopes that it would carry any aluminum debris inside the case out the drain hole with it, but to me, that's a gamble that I am not willing to take. Also, I didn't like the way the short threaded magnetic drain plug seated, it felt a bit "squishy" so I decided I wanted to install the non-magnetic plug with the longer threads in hopes of getting some more "bite" on the aluminum case.
Let's pull that primary cover and do this thing right. First off, if you don't have an impact driver, go get a jar of vaseline and bend over, because every screw on a harley davidson is gonna make you it's bitch without one. Although I love nice tools, you don't need a snap-on, I think I paid 15 bucks for this one years ago, and it works just fine for the casual garage mechanic. 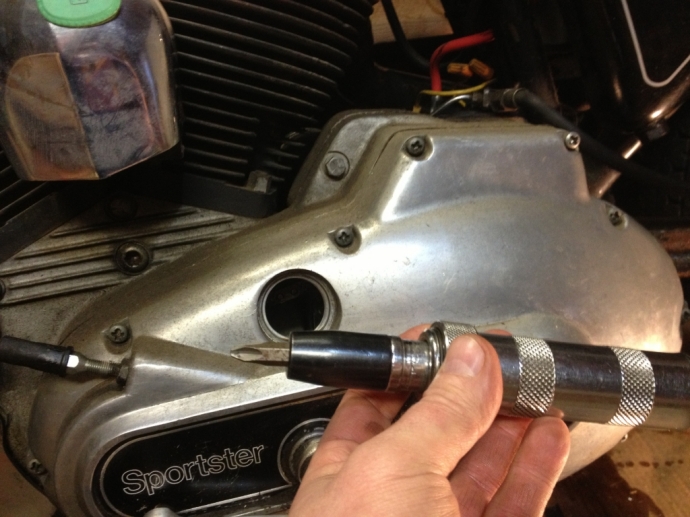
Pull the big cap nut off that's holding the footpeg first, and the peg should slide off easily. NOTE: if you have trouble getting the footpeg or the shifter to slide off, and decide to pry against the alumiminum cover with a screwdriver or pry bar, first grab a ball pein hammer and pop yourself in the forehead a couple times with the round end, (hopefully, that should knock some sense into you and deture you from prying against the cover). 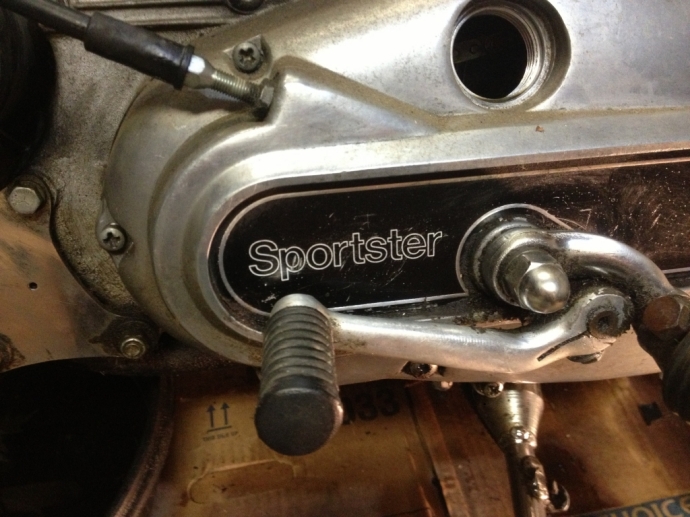
Now we can pull the shift lever, the bolt in the shifter goes through a slot on the shaft so you have to remove the bolt comepletely to slide the shifter off. Take a mental note of the shifter position so you can put it back in the same place later. Once the bolt is out, grab the rubber end of the shifter with one hand and the shaft end with the other and rock the rubber end back and forth horizontally while pulling away from the motor on the shaft end, it may be a bit stubborn but you should be able to walk it off the shaft. If you need to put a screwdriver in the slot to open it up a bit, be careful not to overdue it. 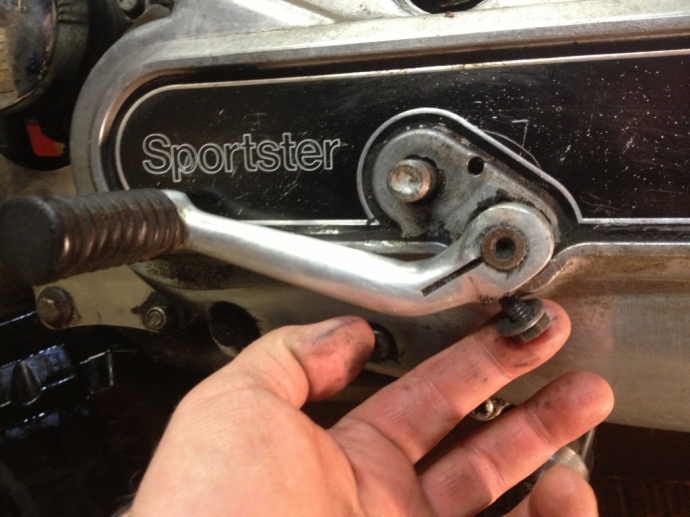
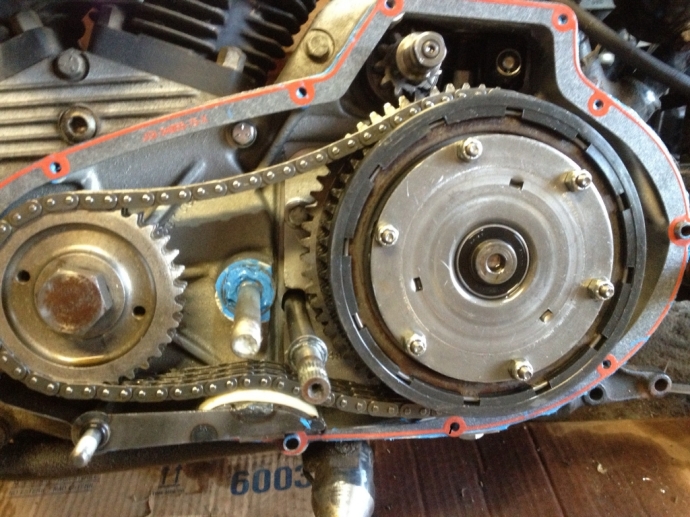
First remove the nut with the red arrow in the pic below. Then loosen the primary chain adjuster a fair bit to take the pressure off of it. My finger is on the primary chain adjuster in the pic below, loosen the self locking nut then turn the bolt out a ways with an allen wrench (it will probably just turn out freely by hand as soon as you loosen the self locking nut) 
We're ready to put the impact driver to work now. I always use a no bounce hammer on the impact driver, it's just nicer, but really any hammer will do. Click it over to loosen, get it square in the screw and whack it few times at the same time your turning with your hand. Nothing to it, they come loose with no stripped screw heads.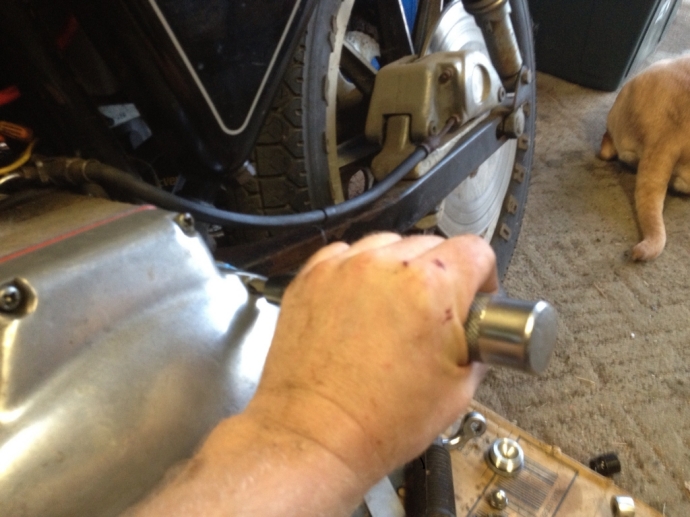
When all the screws are out the cover is ready to come off. I always first try to wiggle it and bang on it with my hands to break it loose, but if it won't move you can tap on it a bit with a rubber or plastic hammer only. Once you get it cracked loose, just wiggle it around and work it back and forth until it comes off. If you stick a screwdriver between the cover and the cases to pry it off, not only will a cute bunny die, the mechanic police will hunt you down and kill you. Here's what if looks like removed, I left the clutch cable connected in this pic. 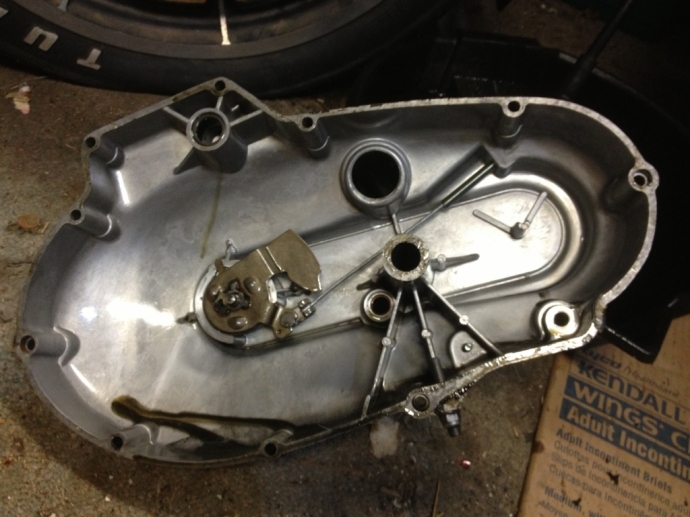
With the primary cover off, I can get a good look at what's going on with the new self tapping magnetic oil drain plug. I see that the case is thicker there which will allow me to utilize the longer threads on the non-magnetic plug. 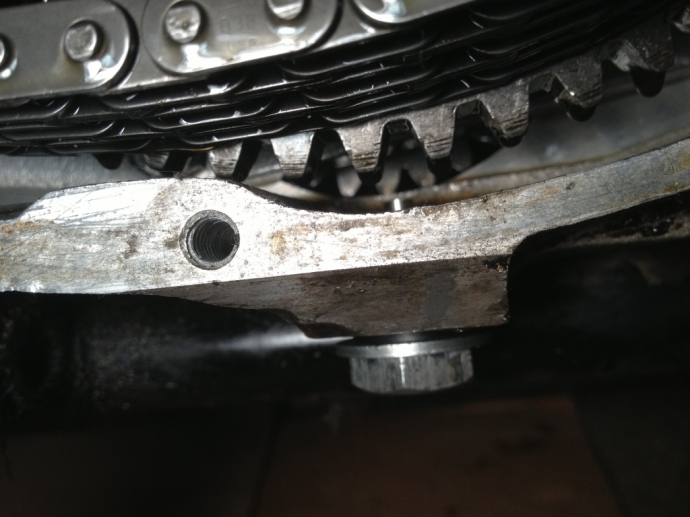
I removed the self tapping magnetic drain plug and replaced it with the non-magnetic one. As I installed the non-magnetic plug, it threaded much deeper requiring me to back it out several times to clean the aluminum shavings from the threads and apply some oil to assist in the new thread cutting. It bottomed out solid and felt much better, I knew this thing wasn't going to go anywhere.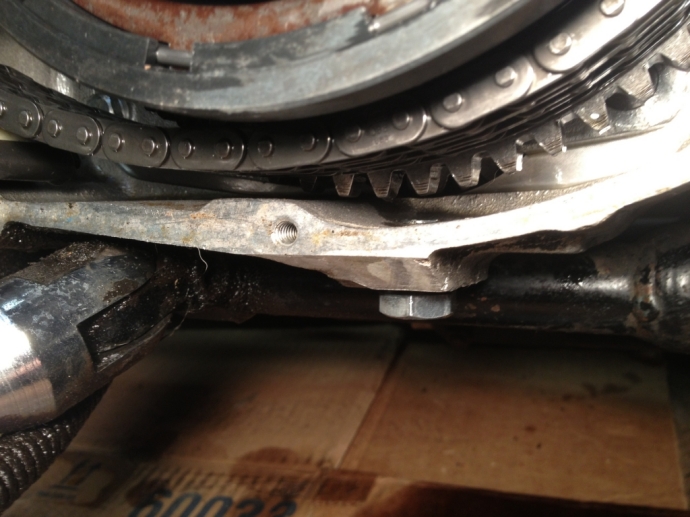
I removed the new drain plug one last time and filed just a tad across the hole inside the case with a small flat file to remove any aluminum burs. Sure enough a large half circle shaped bur came off! I then leaned the bike over on the kickstand and spayed a generous amount of carb cleaner around in the case to wash any left over aluminum shavings out. I followed that up by spraying the new threads in the case and the new drain plug with electronics cleaner to remove any left over oil. I like to use electronics cleaner because it evaporates fast leaving a clean dry surface for the thread locker. 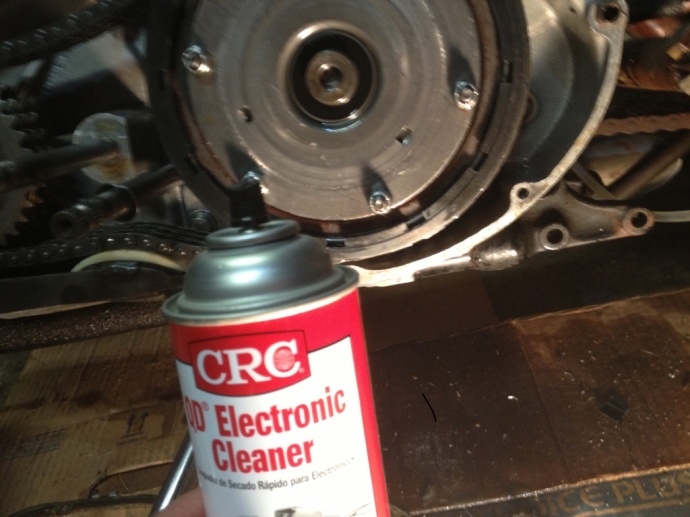
I applied a generous amount of thread locker to the self tapping oil drain plug, and carefully installed it into the case making sure not to cross thread it.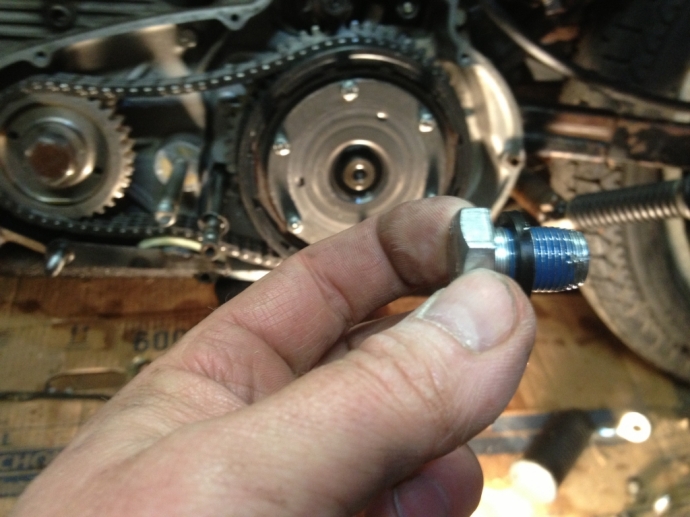
The harley dog is done in the garage for the evening and demanding we go in for treats. We'll take this up more tomorrow... 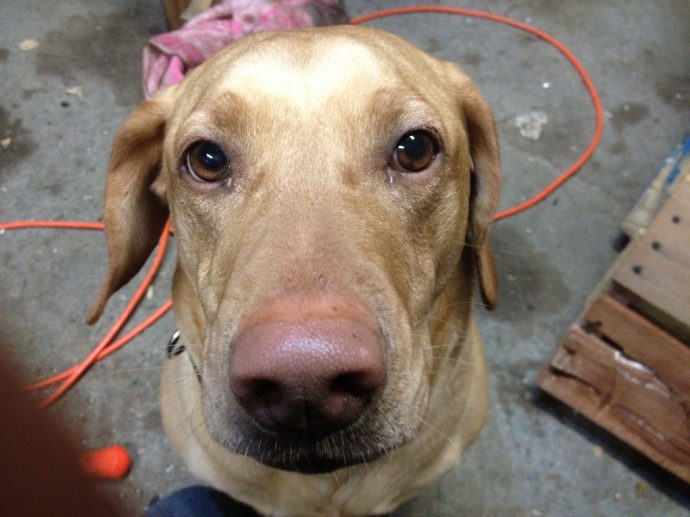
The new gasket set has arrived, perfect timing! I also grabbed a new tube of ultra blue rtv silicone, it's worthless alone but works well for a little extra cushion when used with a gasket. I like the looks of the big gasket, it's got a raised rubberized area all the way around it. 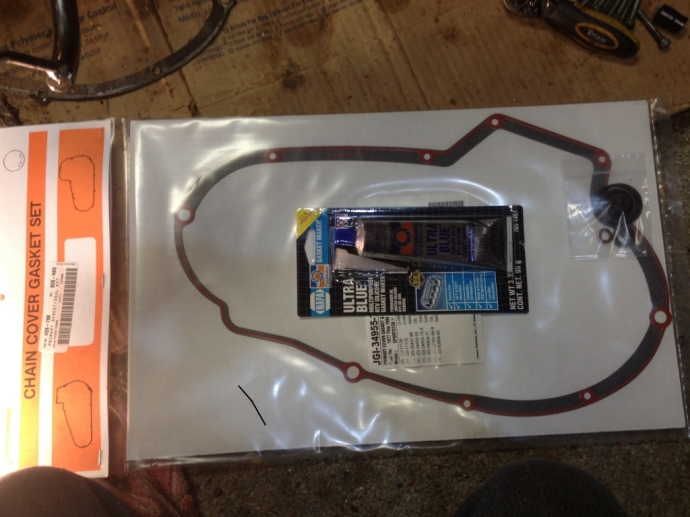
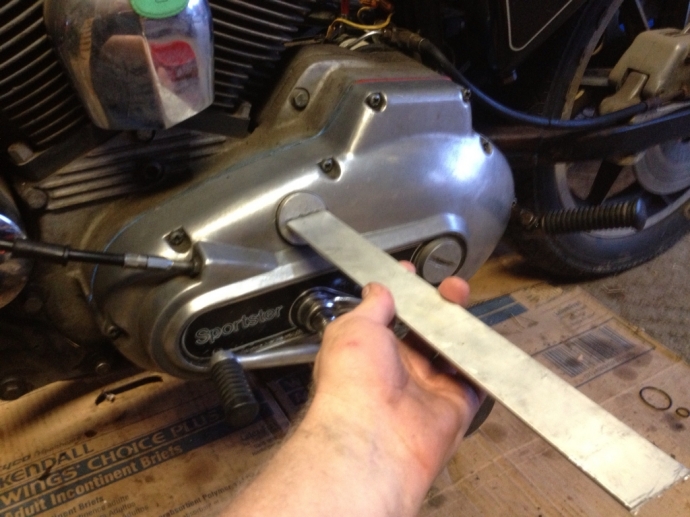
First off, I'll get to work cleaning off all the old gasket material from the case and the cover. Keep in mind this is aluminum and the putty knife is steel. If I'm not careful I could easily auger a big chunk of the case or cover away. Best to keep the knife almost parallel with the surface and easy does it. 
Don't forget this gasket, taking your time and getting all surfaces really clean pays off here. 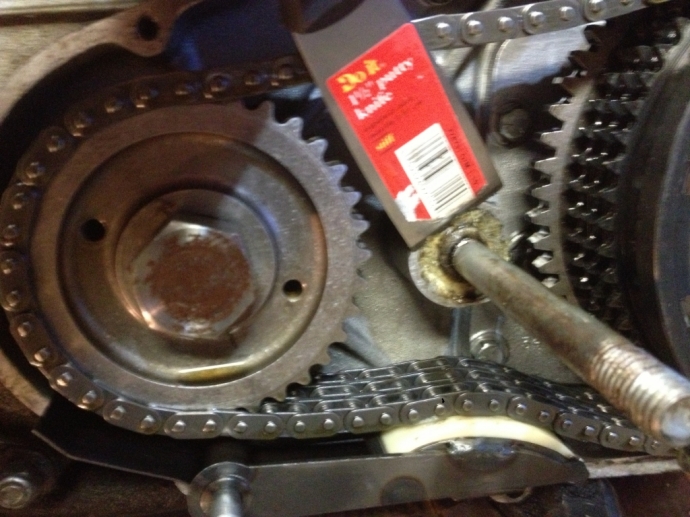
With all the old gasket material removed from the case and the cover, let's get to work on the cover. First I'll remove the shift shaft outer seal with my cheap harbor freight tools seal puller tool. The old seal popped out real easy. 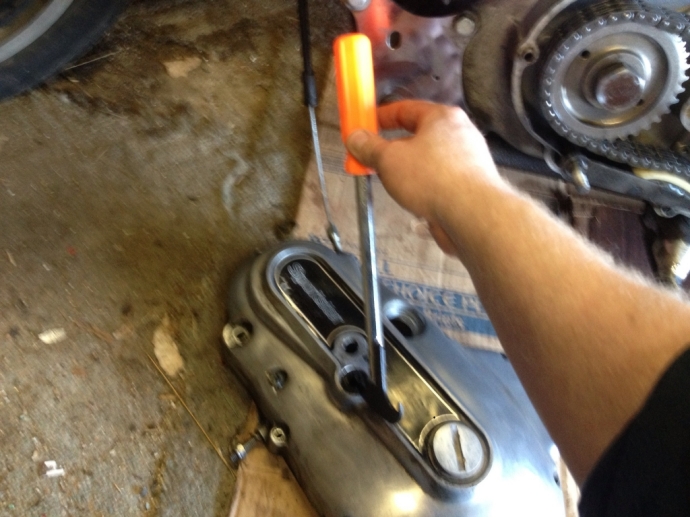
Before installing any seals, I like to grease them up and put a coating of grease around the ouside as well. This is some really really high quality green grease.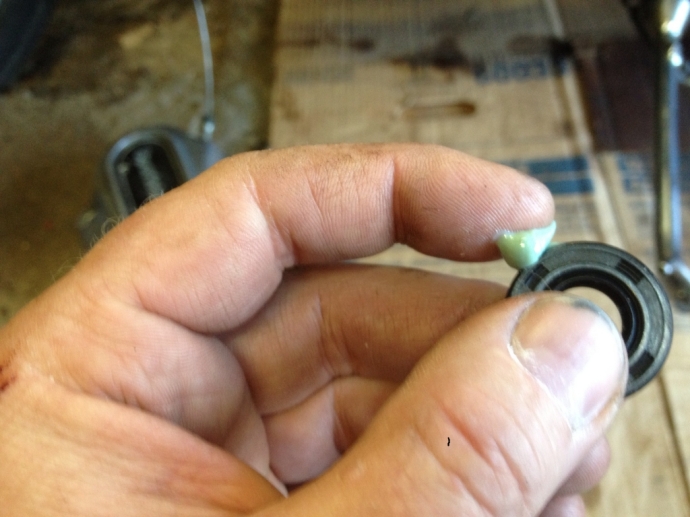
To install the new seal in the cover, use a socket that's just a little smaller than the outside diameter of the seal. Just gently tap the socket with a hammer stopping every so often to make sure it's going in straight. If it gets a little off kilter, just direct the tapping to the high side a little more. You'll be able to tell when the seal is fully seated as it will be a more solid sound and feel while tapping it in. 
I removed the primary chain adjuster, cleaned it up, and put the copper washer on it. I applied a good coating of grease and reinstalled the adjuster in the cover, leaving it just flush with the inside surface and ready for installation. 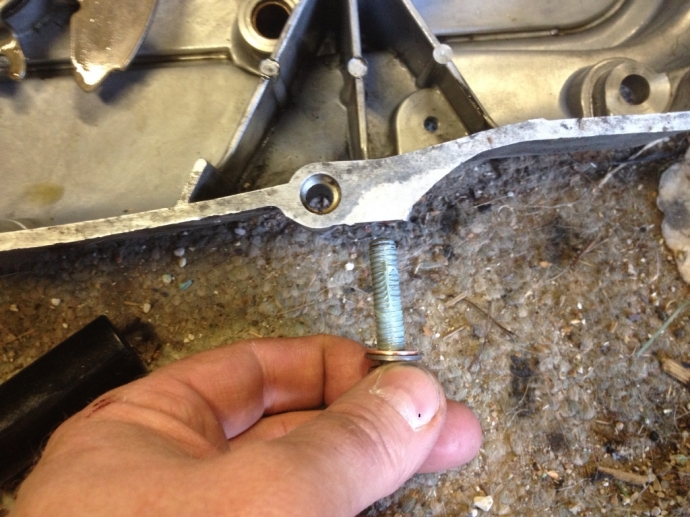
Put the new oring from the gasket kit on the primary chain adjuster arm stud like so.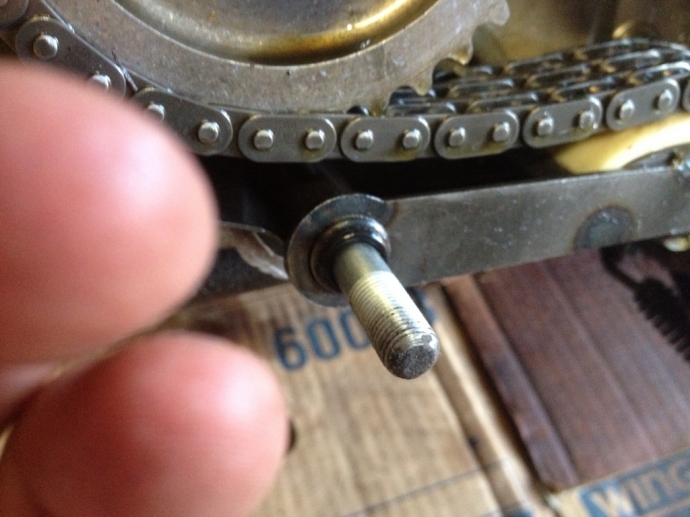
Next we'll grease up the face seal really good and install it up against the spring washer on the shifter shaft. 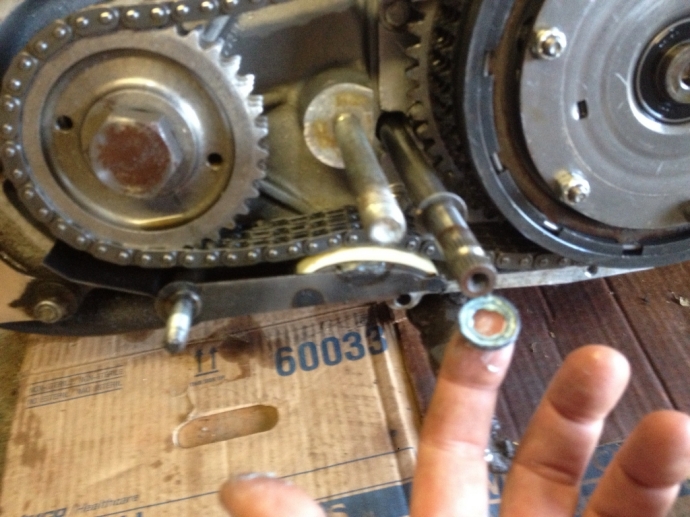
Now it's time to break out the blue rtv silicone gasket maker. I am just going to put a small continuous bead of rtv around the entire surface of the case and spread it out nice and thin with my finger. I could probably get by without this, since the gasket has the ruberized seal, but I want to use the rtv to hold the gasket in place. 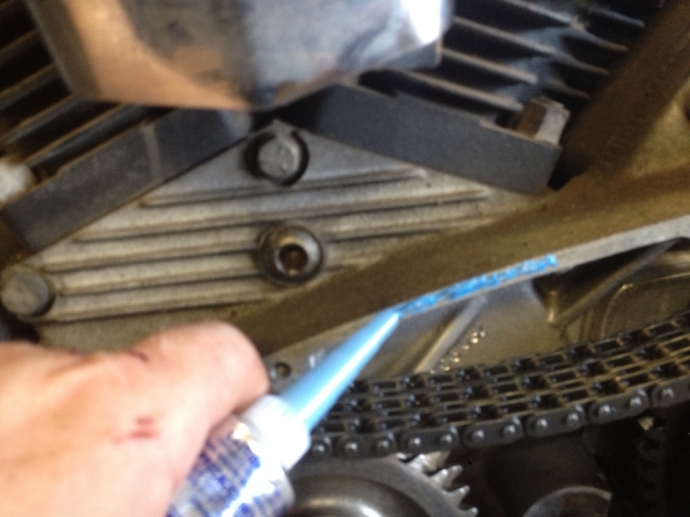
I'm going to apply blue rtv to both the case side and the cover side of the foot peg stud gasket to give it a little cushion and ensure a good seal. 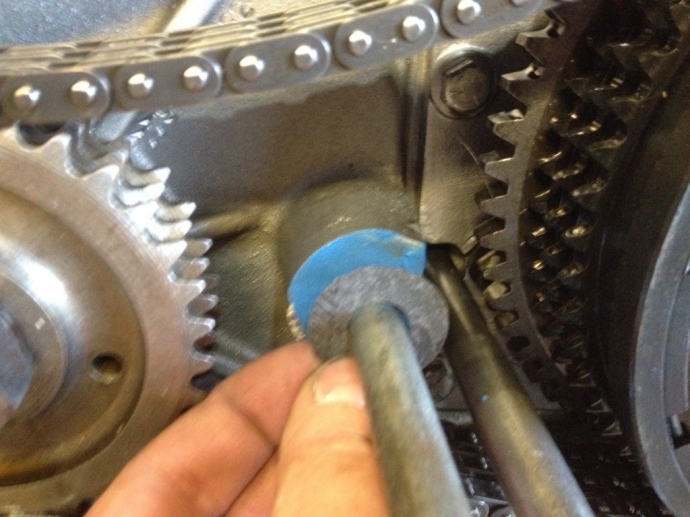
The big gasket is in place on top of the thin layer of rtv silicone. Notice I put a little thicker layer of silicone on the foot peg stud gasket. We're ready to put the side cover back on and button this thing up.
Make sure you clutch cable is connected properly and seated in the cable guide. Slide the cover back on evenly hit it into place with the palms of your hands. Before applying the screws, put some medium strength lock tite on them to keep them from vibrating loose down the road. Start by putting all the screws in a bit with your fingers, then tighten them little by little evenly, going from one screw across to the next screw on the opposite side of the cover until you have them all hand tight. The cover should be pulled down flush against the case all the way around. 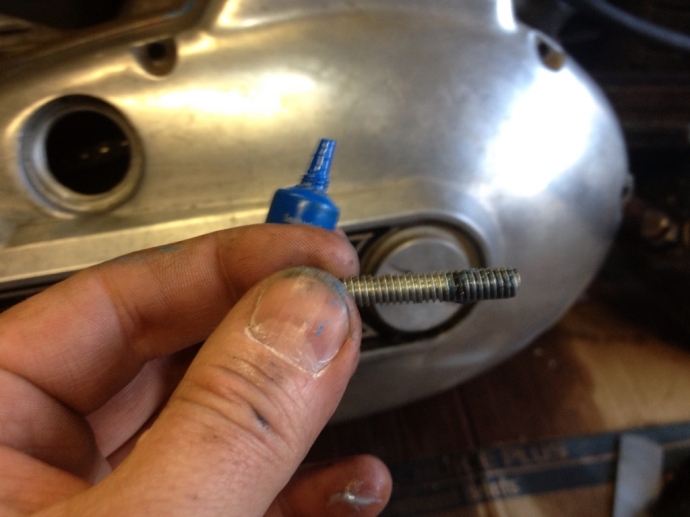
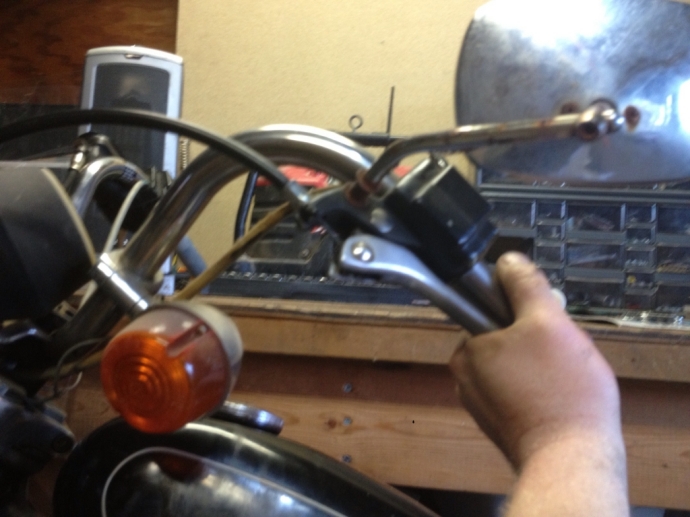
Now is a good time to reach up and check your clutch quick, just pull the lever and make sure your clutch feels like it's working properly.
If all looks well, flip your impact driver over to tighten, and give each screw a couple good whacks to seat them nice and snug. We also want to install the self locking nut on the stud sticking out near the bottom left of the case. Now would be a good time to put a wire nut on your rtv silicone to keep it fresh for next time. 
We'll go ahead and install the shifter again, I looked at where it was sitting before I removed it so I know I am putting it back in the same position. The shifter bolt is a good candidate for the red lock tite. Go ahead and install the footpeg now as well. 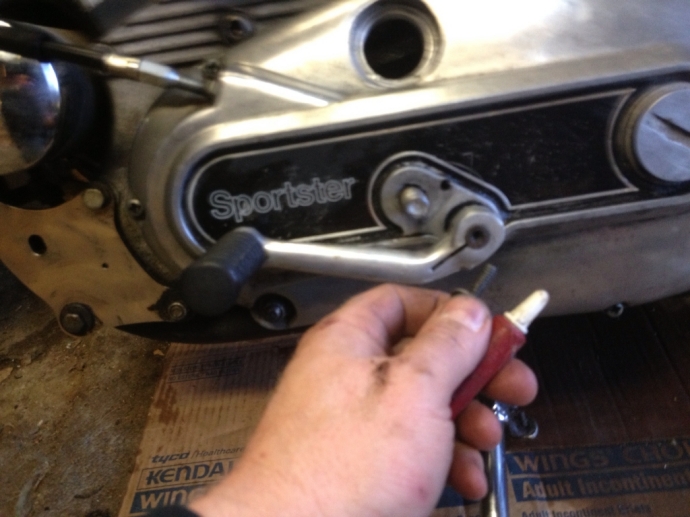
Set the bike up straight by putting something under the kickstand. Two pieces of 2x4 seem to work just right for mine. Now we will be adding about 24 ounces of our favorite tranny/clutch oil. Just fill it until it starts to come out the oil level screw. 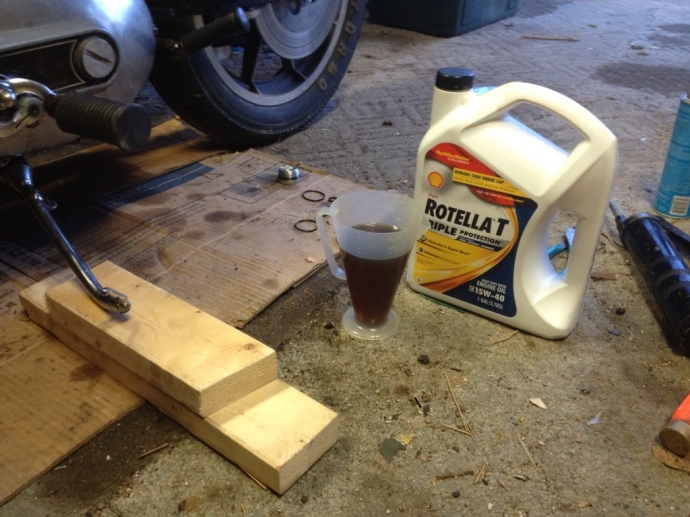
Put the fiber washer on the cluth oil level screw and snug it up in the cover. Here I am pointing to the oil level screw with my impact driver. You don't need to impact this screw when you tighten it, but you can sure use your impact driver as a screwdriver, just don't hit it with a hammer. 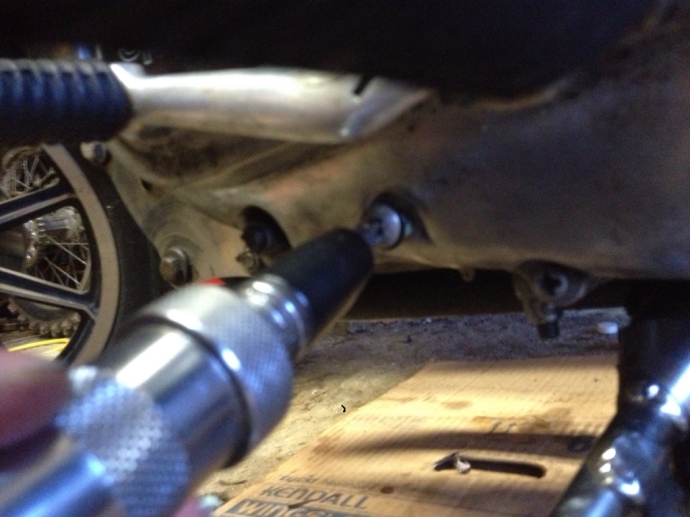
Before we put the plug in the side cover we need to adjust the primary chain. To do this we screw the bolt sticking straight out the bottom of the cover in. I wiggle the chain up and down with my finger as I tighten the stud. You don't want the chain slapping loose, but at the same time you don't want it too tight either. Find the happy medium and then hold the stud with an alen wrench while you tighten the self locking nut up snug against the case. Now install the plug in the cover and your done! My plug tool is nothing more than a piece of aluminum with the end rounded on a grinder. Works like a charm.
I hope this article is helpful. The bike hasn't leaked a drop of oil since the repair. Thanks for checking out my website!
Jim Marquardt - 4strokeengine.org